STEP 0: Create account on the new portal
First, access the Fibre portal located at https://portal.fibre.org.br.
You will have two options:
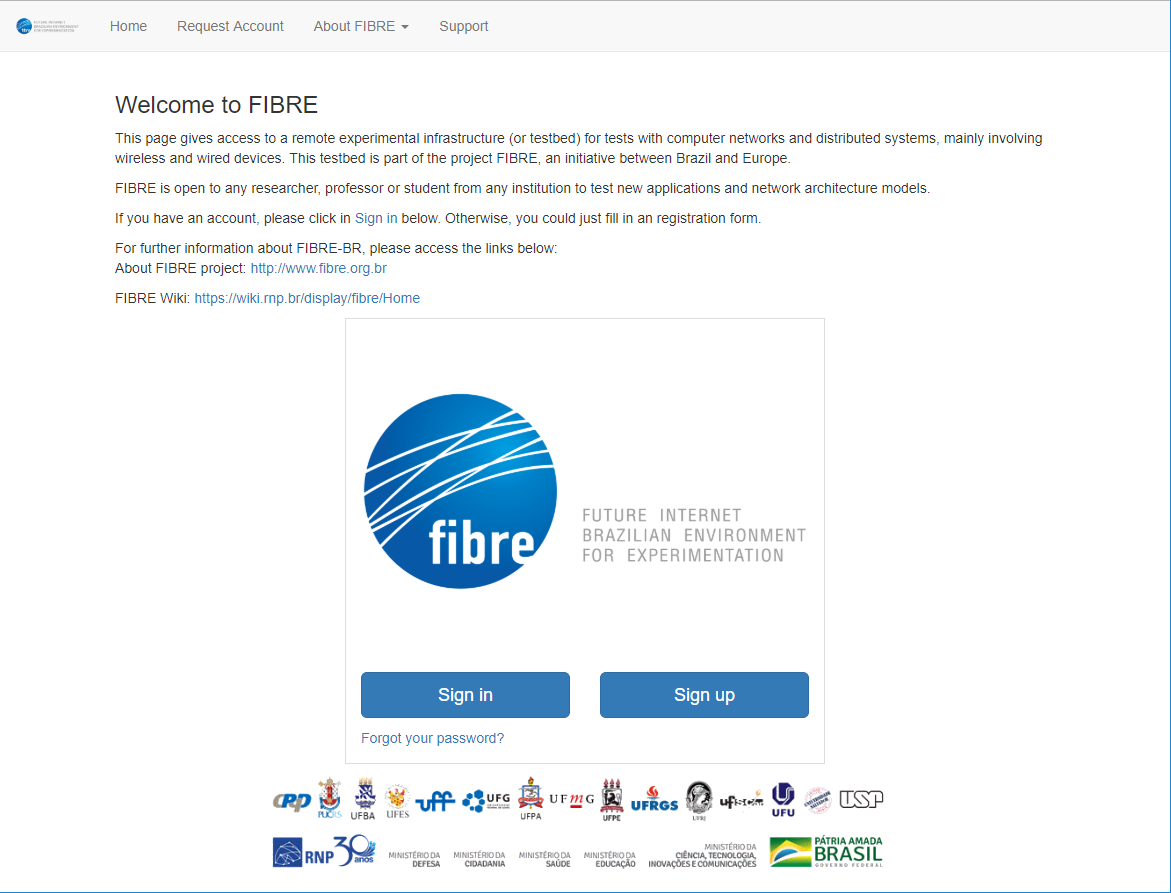
To create a new account you will find click on the ‘Request Account’ in the top menu.
By clicking on this link you will be redirected to the form and you can create your account.
Fields marked with an asterisk (*) are required to create your account.
In addition, you must accept our terms of use and not be a robot.
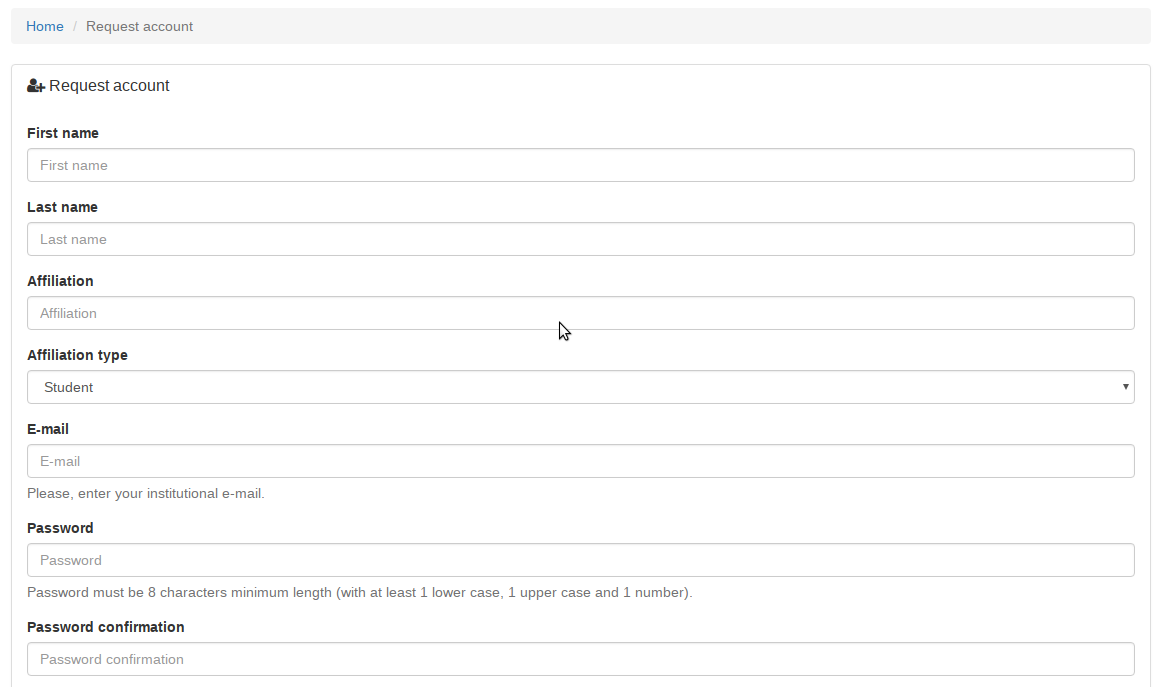
By completing the form, click on “Request Account” button and wait for our email so that you can validate your account.
After received the email, just click on the “validation link” to validate your account and you already can access the FIBRE portal.
STEP 1: Access the FIBRE Portal
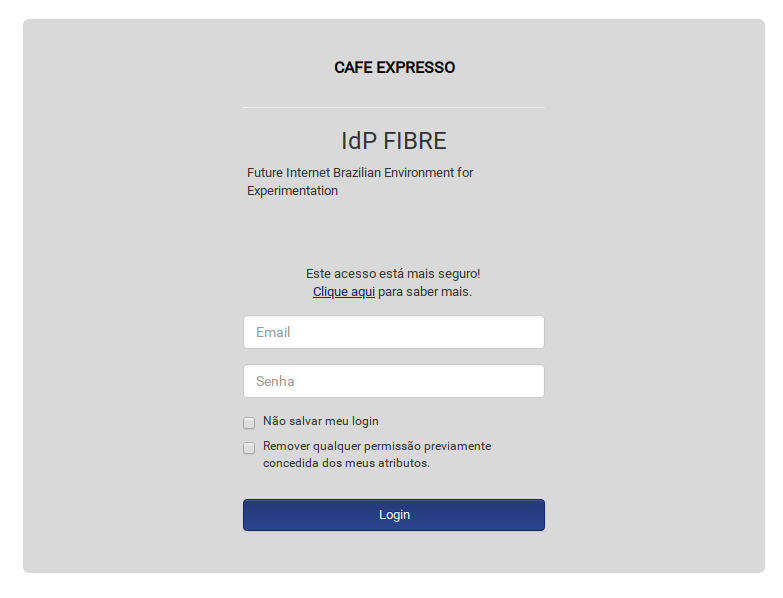
To access the FIBRE portal, go back to the portal login page and click “Fiber IdP Login” in the lower left corner.
You will be redirected to the CAFE Expresso login page.
Enter your credentials and password account and click ‘Login’ button.
In the end, you will be directed to the ‘Home’ of the FIBRE portal.
Now, you will have two options:
- you can request to participate in an existing project; or
- request an account upgrade to create your own project.
STEP2: Creating/Join a project
In the OMF6 there are two types of accounts:
- Basic user account (the user is able to request to join in an existent project.); and
- Full user account (the user account can create and manage their own projects).
STARTING WITH BASIC USER ACCOUNT:
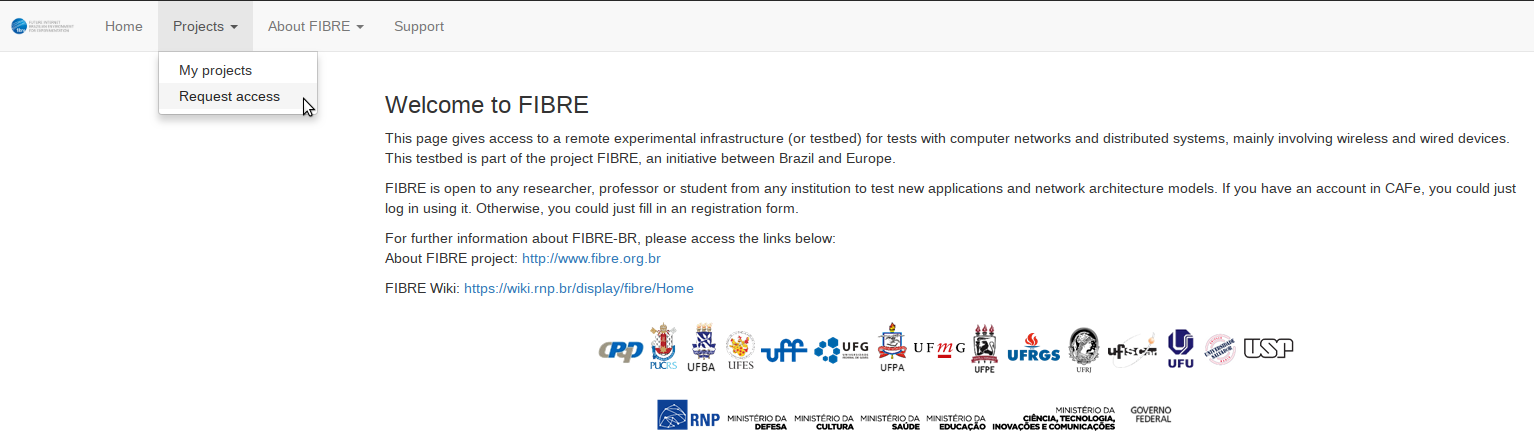
To join an existing project, log in to the FIBRE portal and access your workspace.
In this screen, you can see on the top menu an option called ‘Projects’. After that, click on ‘Request access’ option.
Now you will be redirected to a list of all projects that are in the FIBRE testbed.
To select one, you can use the search bar and click on respective ‘Join Project’ button.
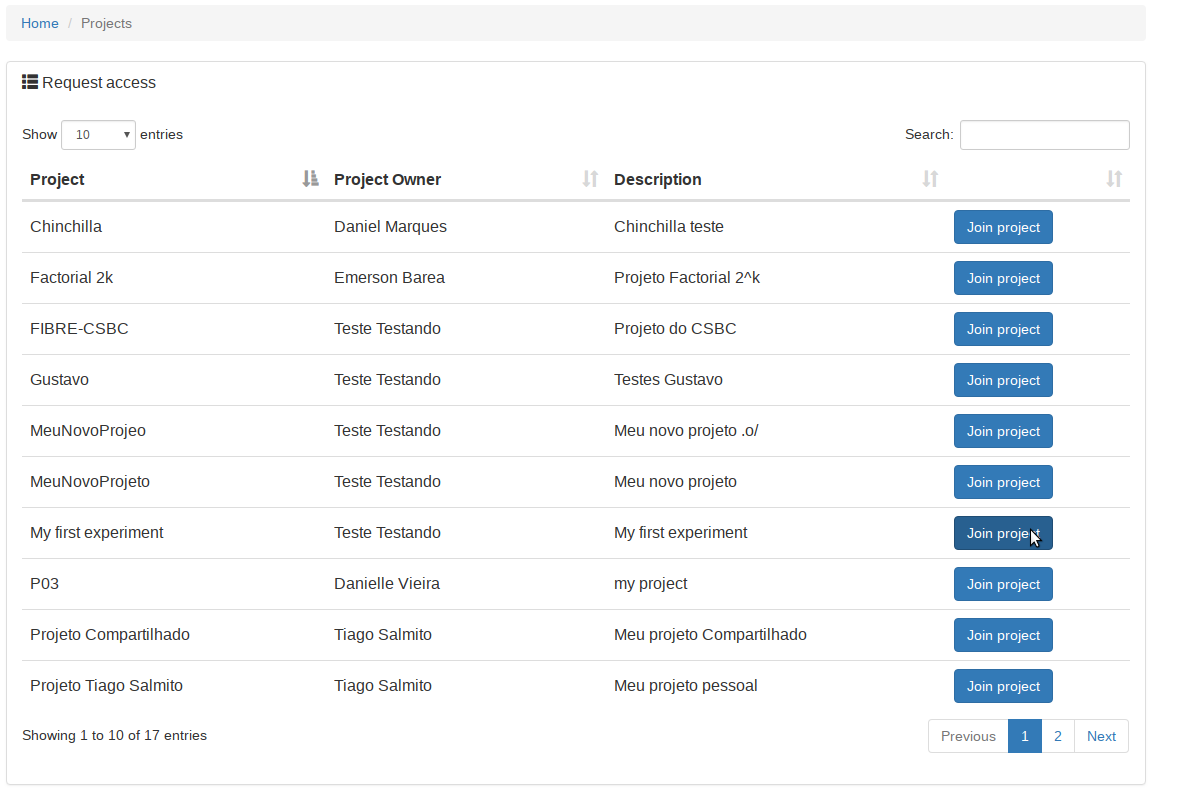
After that, the owner of the project needs to approve your request.
STARTING WITH FULL USER ACCOUNT:
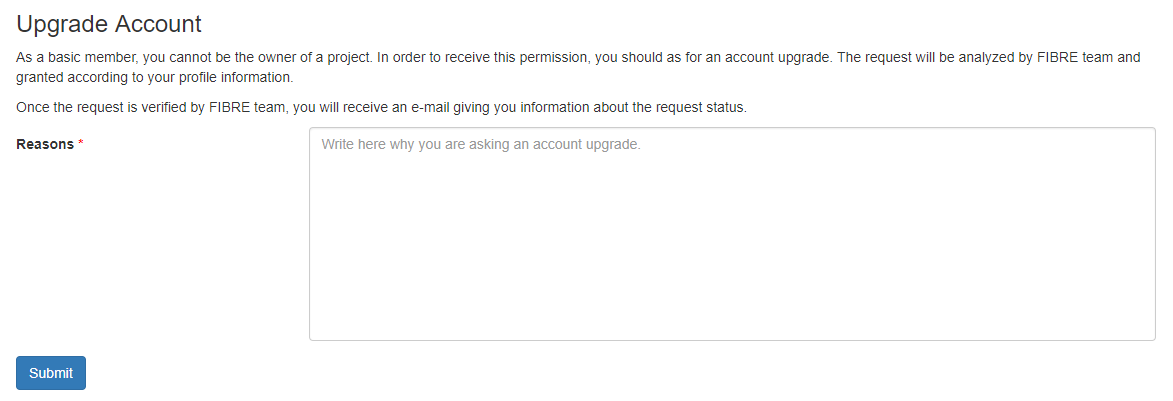
If you are a professor or a researcher you can request an upgraded account and create your own projects.
To do it, click on the bottom “Request Upgrade Account”.
Now you have to in describe in details why you need the account upgrade, just click on ‘Submit’ button and wait our approval.
After your submission was approved, you can able to see the ‘Create project’ button.

Now you can use the project creation form, complete the form filling in this form: project name, expiration date, expiration time and a brief description of the project.
Fields with ‘(*)’ are required.

After completing the form, click on the ‘Create’ button and your project can already be viewed in your Workspace.
STEP3: Creating a new Slice
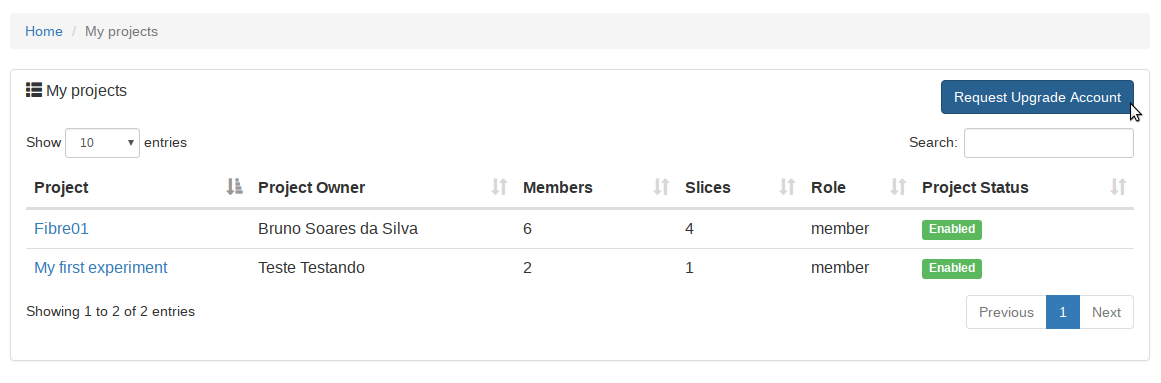
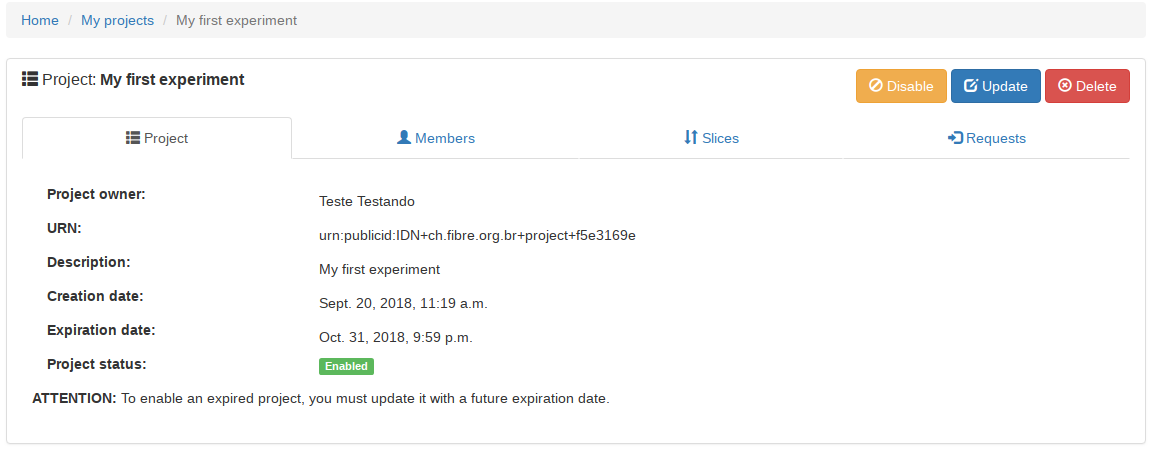
The project can be viewed in the ‘Workspace’ menu.
In this menu, you will get a summary of your project information such as a number of slices, number of members and project status.
For more information click on the title of your project.
By accessing your project you can view more detailed information and you can disable it, delete it or update it.
In addition, you can view project members and remove them, create and remove slices, and start your experiments.
To create a slice, click the ‘Slices’ tab. On this tab you will see a list of all the slices present in your project.
To create a new slice, click on the ‘Create Slice’ button.
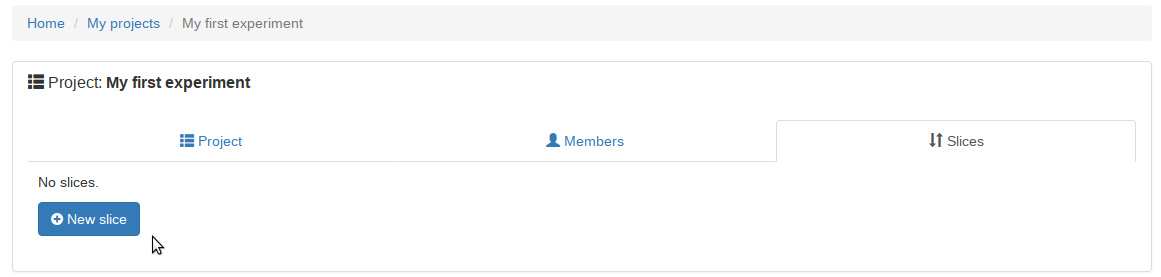
Click on the ‘New Slice’ you will be forward to a wizard that will help you to create a new Slice.
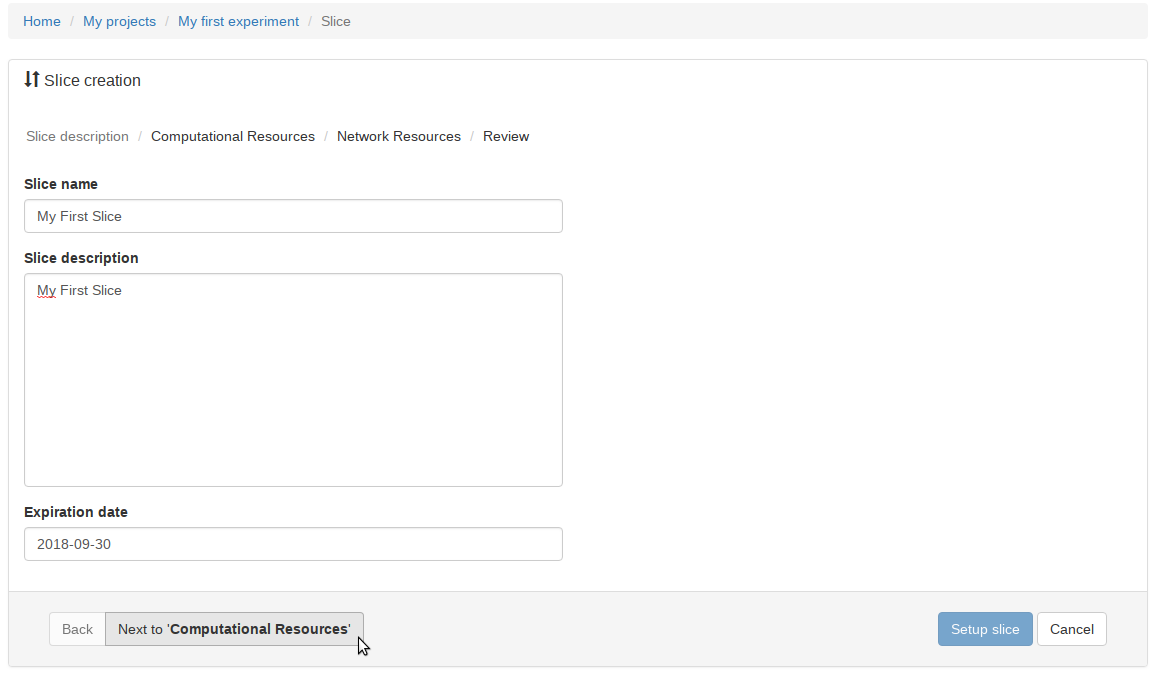
First, you must enter the name of the slice, a brief description of the purpose of this slice, and the expiration date/time.
After that, click on “Next to Computational Resource”.
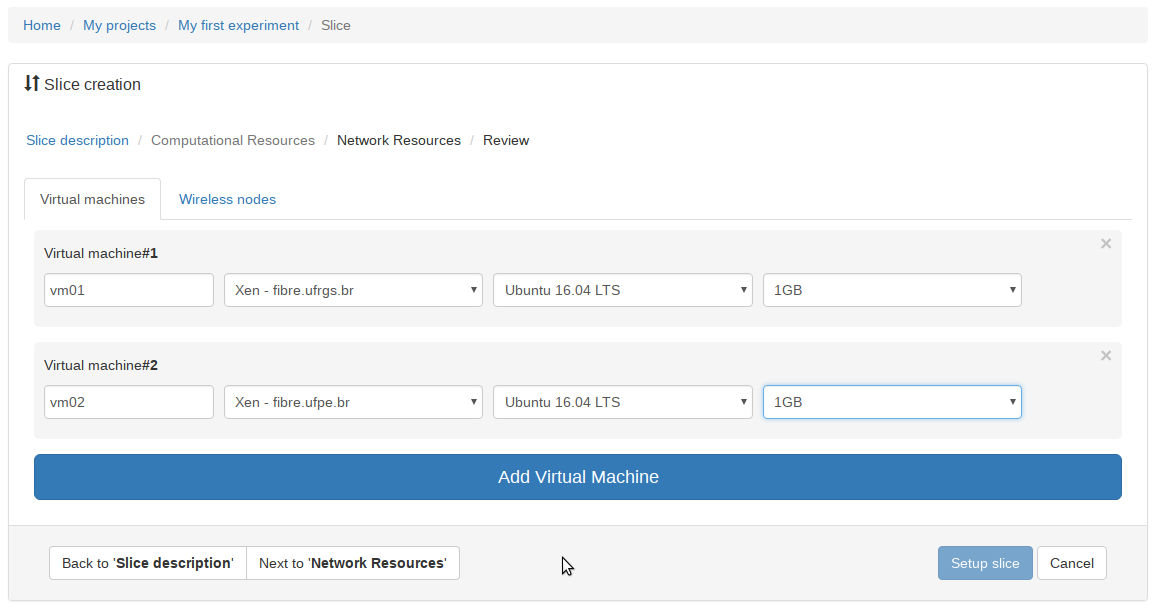
Next, you will have to define the virtual machines. It is required the name of the VM, the hypervisor on the VM will be hosted, the template of the VM operating system and the amount of RAM.
After defining the VM parameters, you can click in the ‘Next to Network Resources’.
On this page, you will have to select one VLAN ID that will be provided to the user at the moment of the start experiment.
On this version, a network topology will be suggested between the hypervisor selected before.
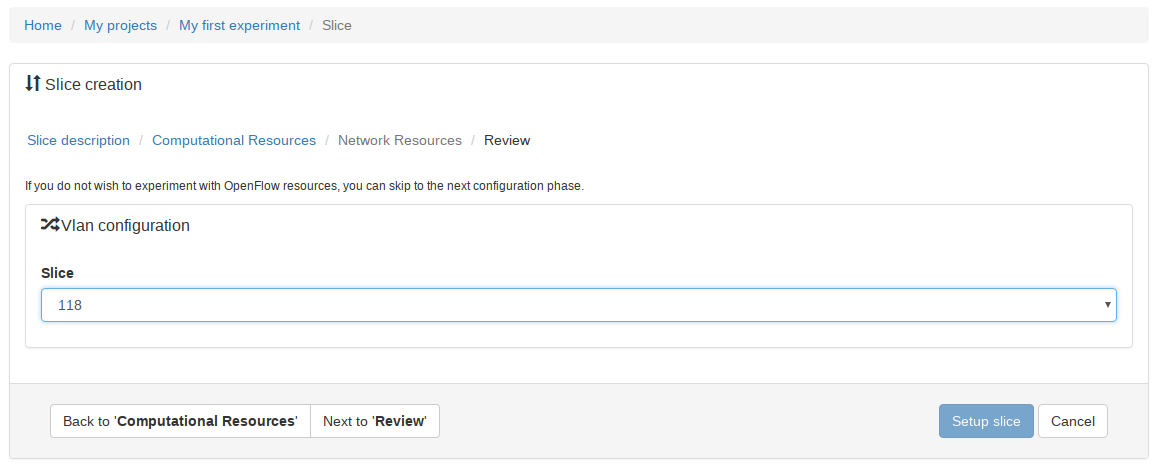
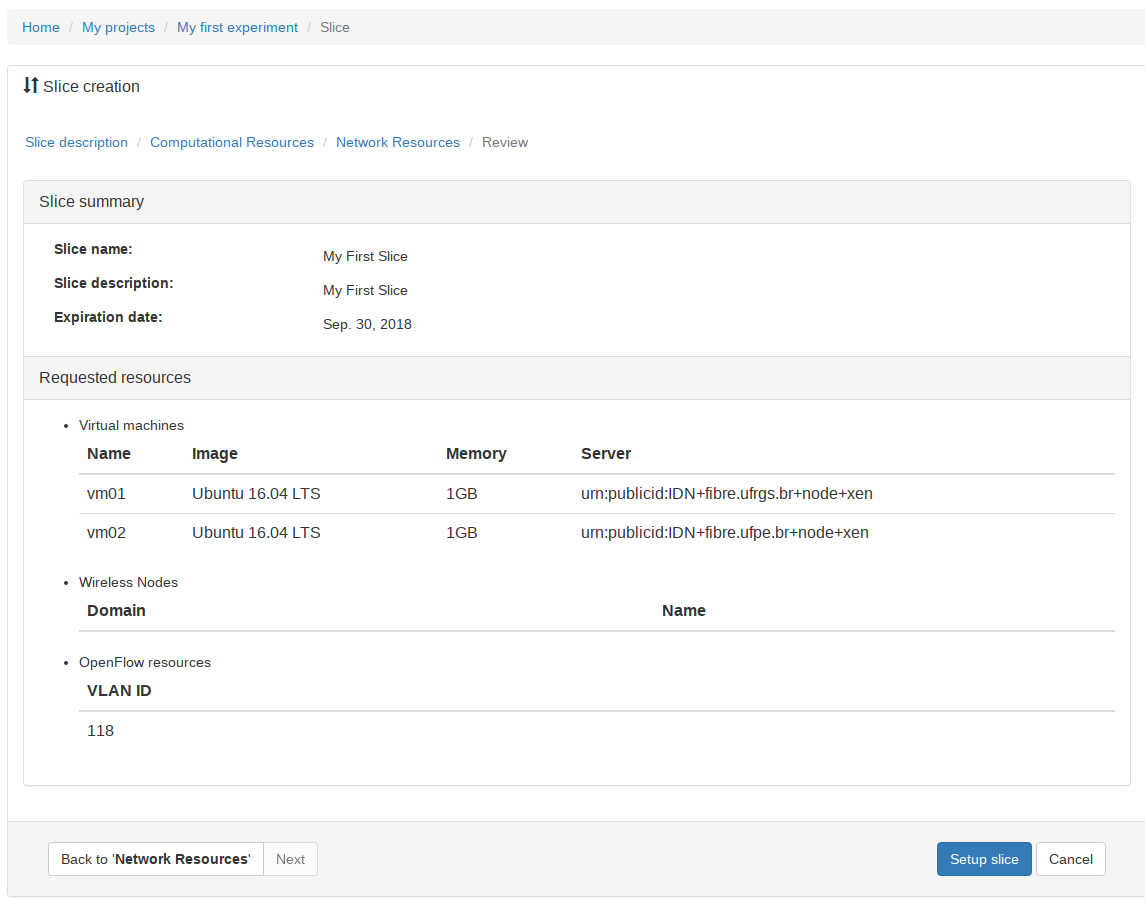
Finally, a slice summary will be present and you can review your reservation.
If your slice is ok, then click on “Setup Slice”.
STEP4: Make a reservation
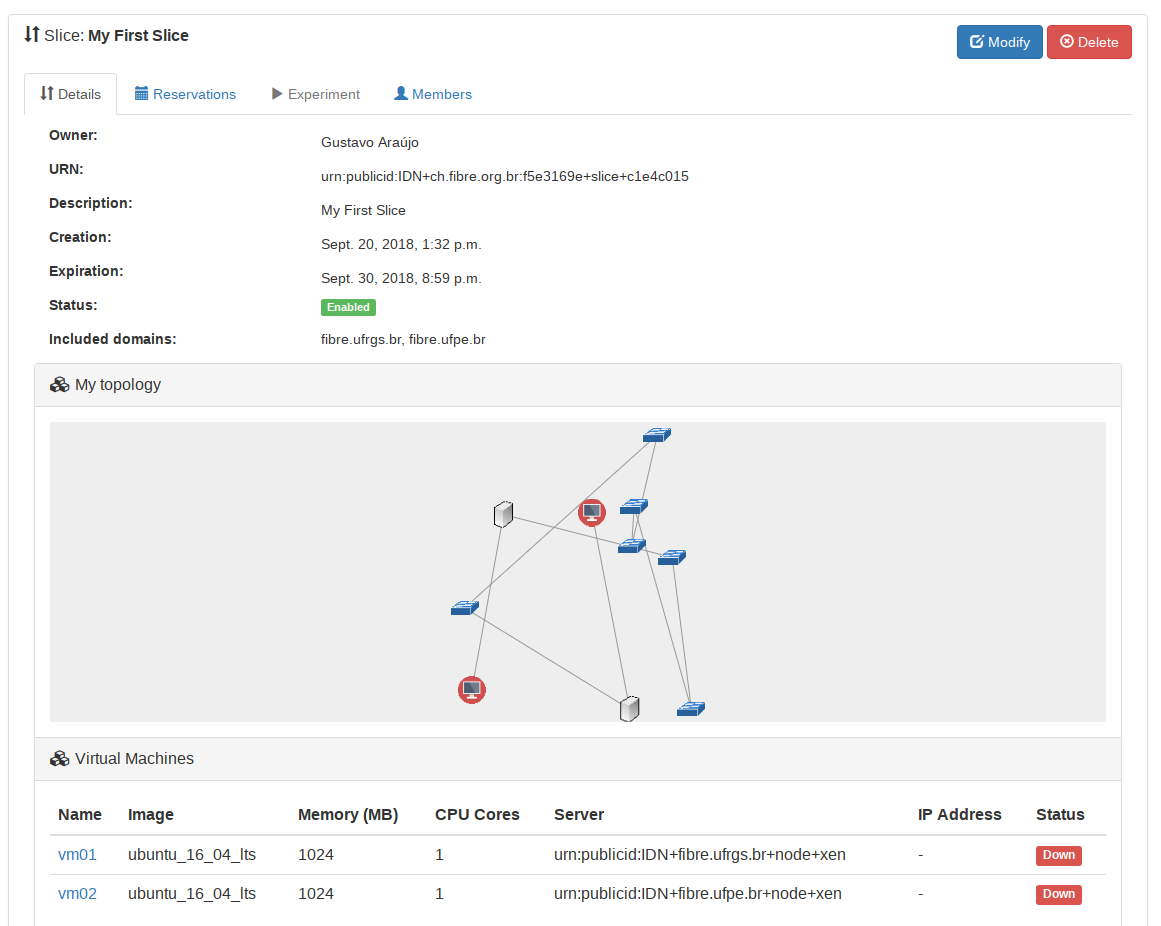
After create the slice you will be redirect to the list of slices present on the project.
You can click on the slice name and access the resources and see the topology.
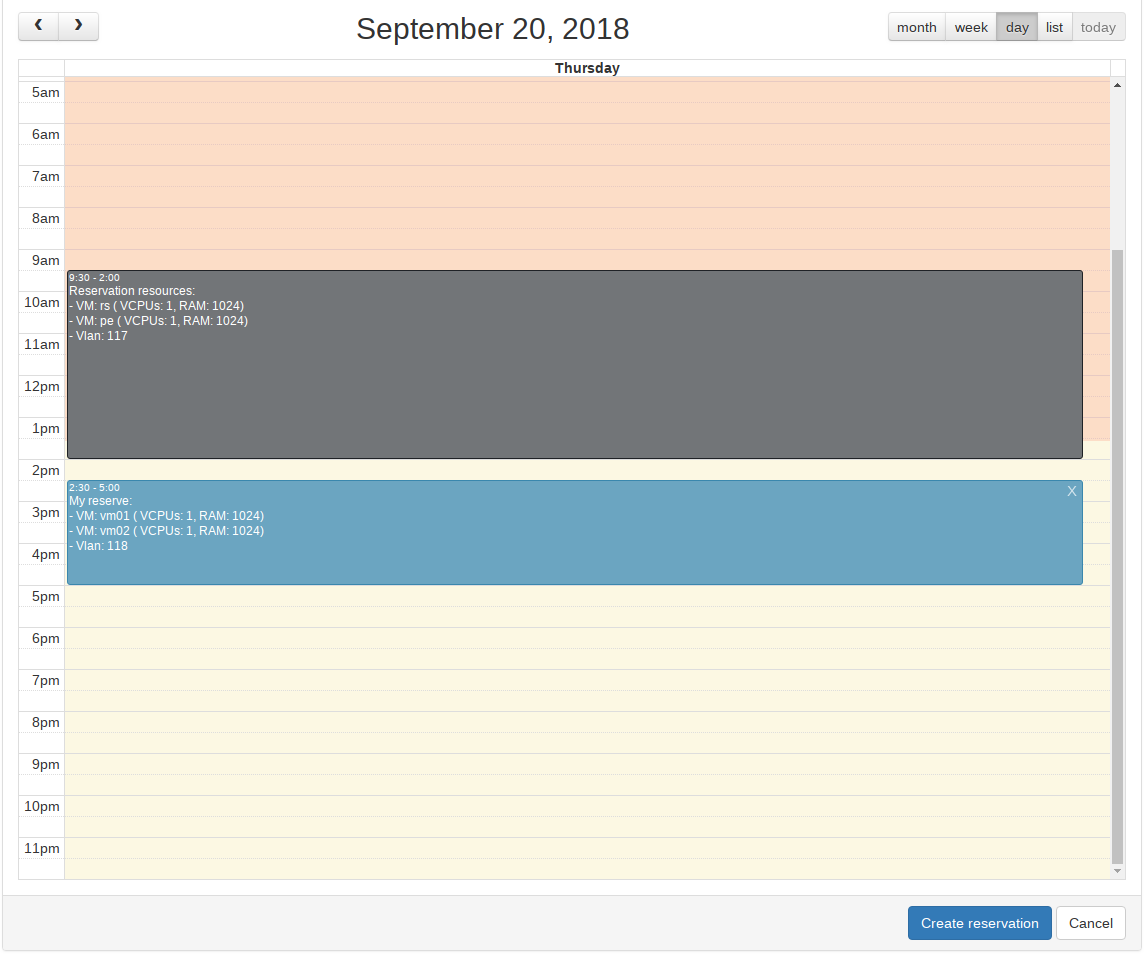
Click on the tab called ‘Reservations’. Click on the button ‘Create reservation’.
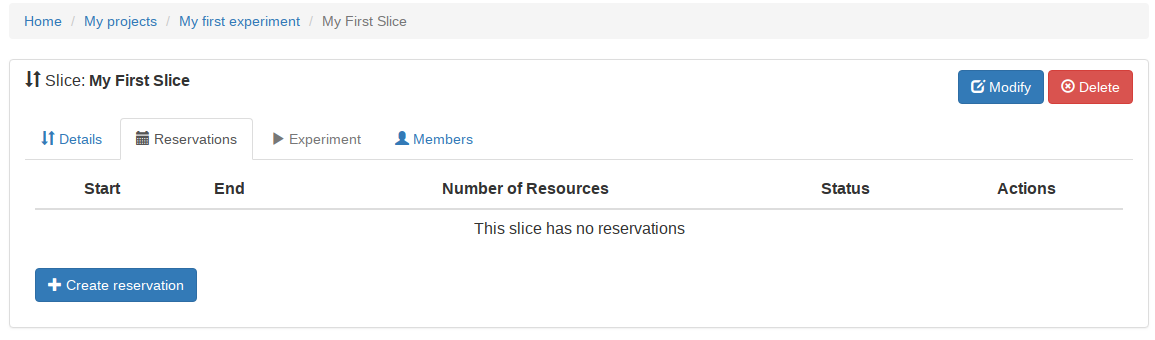
You will be redirected to a calendar view. On this view, you can drag and make the reservation.
Finally, click on the button ‘Create Reservation’.
STEP5: Run the experiment
Now you can run your experiment only during your reservation period.
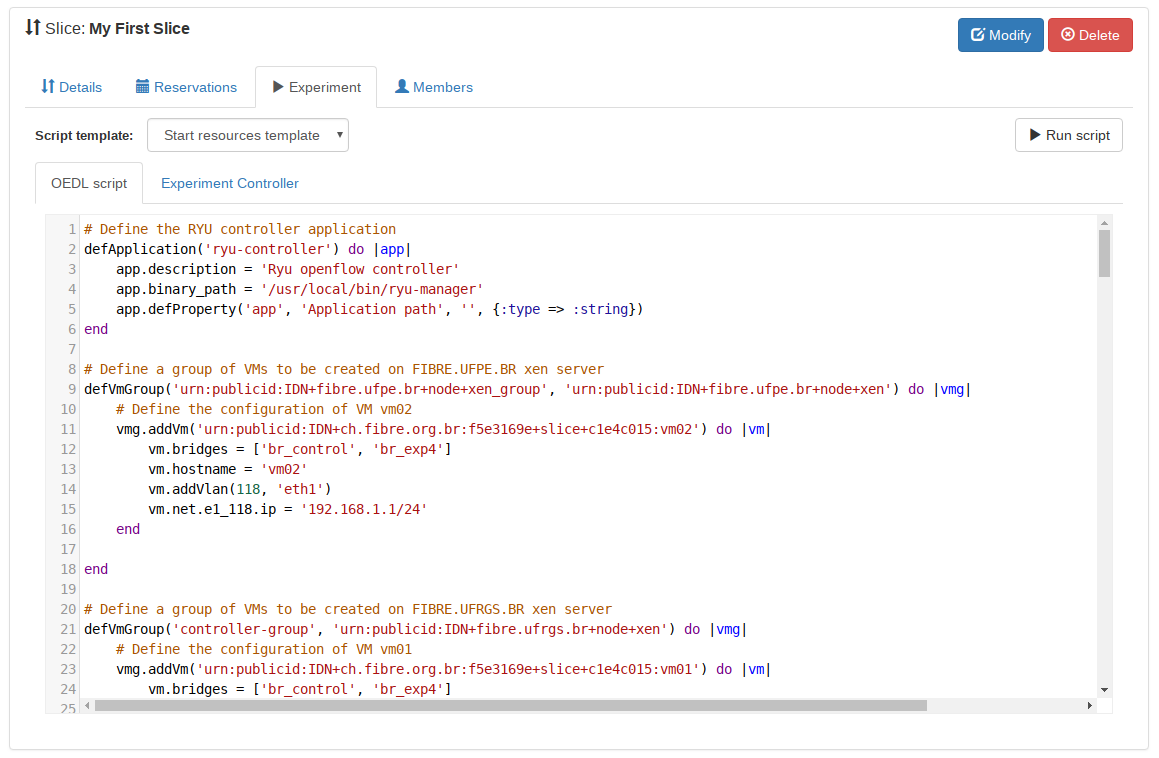
To run the experiment you have to click on the tag ‘Experiment’.
On this tab, you can see and text block to write your own OEDL script, or use someone of the scripts templates.
At this moment, we have two templates:
- Start Resources: initialize the resources (VMs and Flowvisor), initialize a Ryu controller in some of the VM and let you access the VMs.
- Stop Resources: shutdown the virtual machines and delete the slices of the flowvisor.
To select one script click on the combo box and select the script. You can see the script on the text block.
It is possible to edit the OEDL script to better suit your experiment.
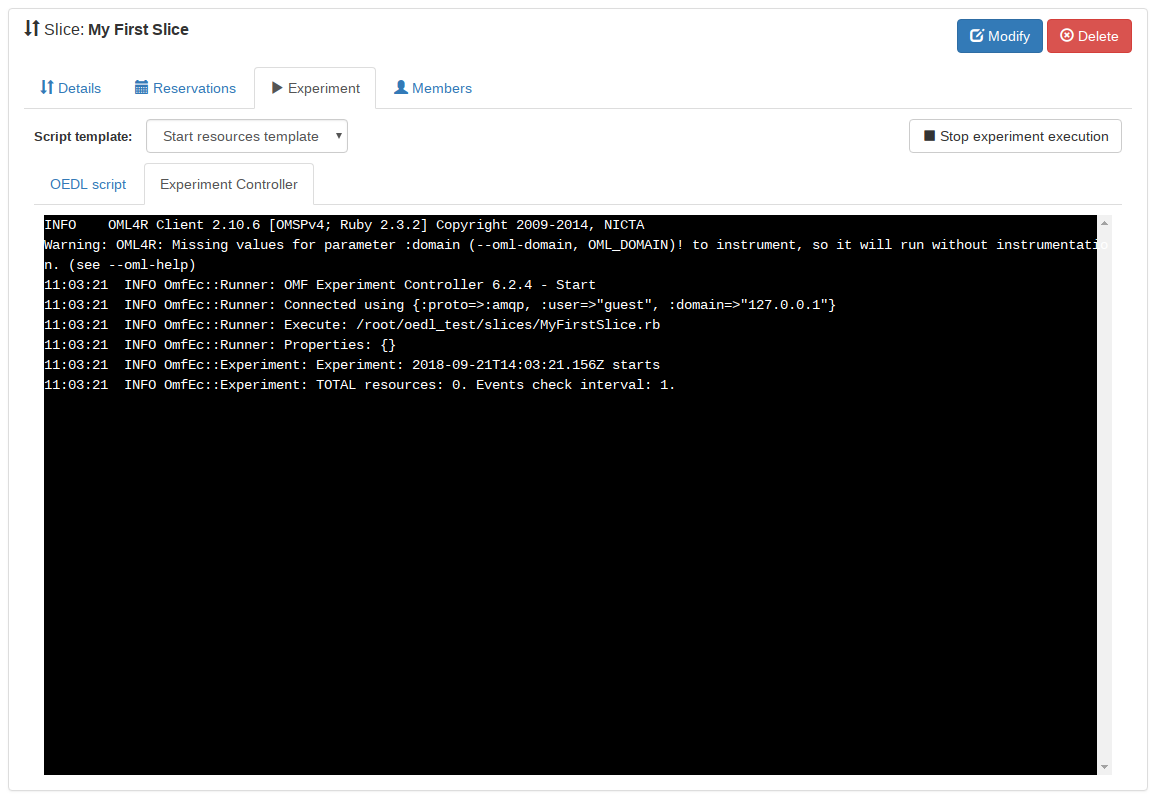
To run the experiment click in ‘Run script’.
You will be redirected to the ‘Experiment Controller’ and will be possible to see the progress of the resource allocation.
After the resources are completely up. It is possible do access the VMs by a web terminal.
To do it, go back to the ‘Details’ tab and double click on the computer icon.

To access your Virtual Machine’s console you can click on the VM name ou on the computer icon in the topology area.
Thru the console of the VM you can setup your experiment and run it.